
|
|
|
|
||||||||
*** !!!ALWAYS UNDER CONSTRUCTION!!! ***
UPDATE 02/12/03 New 99 (and now legal) head is here!!!!! Mild port job (with an eye towards velocity), unshrowded valves, backcut valve stems and shaved .018". Intake ports flowed 232 cfm @ .400 (28") vs the '94 head I was using flowed 174cfm! Here I come 160 rwhp and 125 ft lbs torque!
28"
stock ported
lift cfm cfm
.100 81 83
.200 153 159
.300 195 208
.400 207 232
10"
stock ported
lift cfm cfm
.100 50 51
.200 93 97
.300 120 127
.400 126 142
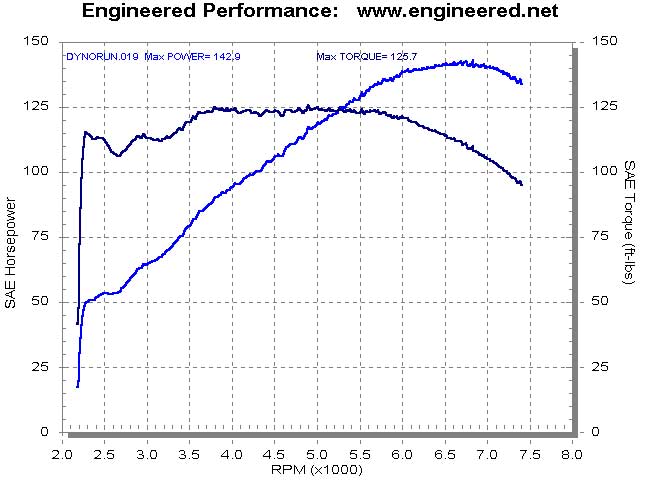
UPDATE 02/22/02 Half way there, got to my 125 ft lb torque goal! I just couldn't get the Webcam 515's to make any torque, I tried and tried with all kinds of tuning of the cam gear adjustment but I just couldn't get over 118 ft lbs peak and could never get anything decent under 4000 rpm. They would be useful for the track where you could keep rpm's up but for autocross I just couldn't get them to work.
So for the last three months I played with many cams to get my goal of 125 ft lbs torque and 160 hp at 7000 rpm. I tried four different cam sets (8 cams), some with minor improvement and some with negative improvements - also playing with combinations, cam timing and did 3 dyno sessions in between to verify output. I have discovered that peak hp is relatively easy to come by with a cam swap, it is keeping any assemblance of torque along with it that is the hard part. I finally found a combo made up of a MazdaSpeed 260 duration 9.0mm lift intake and a 99 OEM 250 duration 8.9mm lift exhaust that did the trick. This initially made tremendous torque but not much hp so I opened up the overlap quite a bit with 6 degrees advance on the intake and 5 degrees retard on the exhaust and this added about 10 hp after 5500 rpm for a total of 143. You'll notice this is 11 rwhp down from the 515's peak of 154 but the torque curve is more usable and exactly what I need for autocross (also note the dip in the torque curve from 2500-3500 was removed in subsequent tuning sessions to an even 120 lb ft). It is so much better that I have delayed installing the 4.778:1 rear and keeping the 4.44 until I see how it behaves on course.
Next steps are to increase the peak hp from 143 to my 160 rwhp goal and keep the torque I've found. I will do this by making the head flow better since the many dyno runs showed that the power drops after 6700 from lack of flow. I will exchange my 94 CSP head for a Prepared built 99 head. The 99-00 head has proven to outflow the earlier Mk1 head by a substantial amount. I will get it shaved .018", lightly ported, unshrouded valves, cc'd and then have backcut intake valves installed. I will probably adapt my earlier Mk1 1.8 intake manifold to it since I cannot seem to find any 99-00 intake manifolds for a decent price. I might also try a MSD DIS with RX-7 TII ignitors to make the spark a little stronger. That should complete my goal for 160 rwhp and 125 ft lbs torque. Will I finally be done?
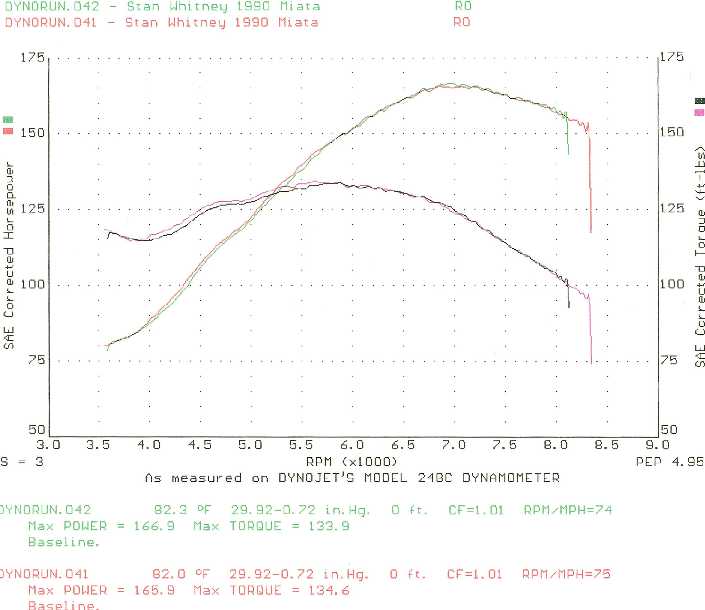
UPDATE 10/12/01 Here is the latest dyno graph showing 154 rwhp. Not bad considering that there were just 320 miles on the new motor. The rings probably haven't fully seated yet and there is still dino oil in the pan. This was also after only doing some gross tuning using the FM Link MASTER FUEL and IGN TRIM features based on my curve of the old motor. Notice the poor tuning I have at the 5500 (80 mph) and 4000 rpm (55 mph) where the new motor didn't like the old curve. With more break-in time and better wide-band O2 tuning 160 rwhp is an easy target.

UPDATE 9/23/01 Finally got the new shortblock complete and installed in the car. This time I used the opposite formula of building a short block and using a nearly stock head (My old CSP head - for no particular reason other than I'm short for time. Ultimately a legal built head and the built shortblock will be together - that's next!). The block was bored +.020" using 2001 10:1 stock replacement pistons, block decked .026" to get the pistons .002" in the hole (yes, there is a lot of extra height to the blocks) and the crank lightened,balanced and mildly knife-edged. The CR with the combined overbore and decking (and prior head shave) is 11:1.
New built shortblock 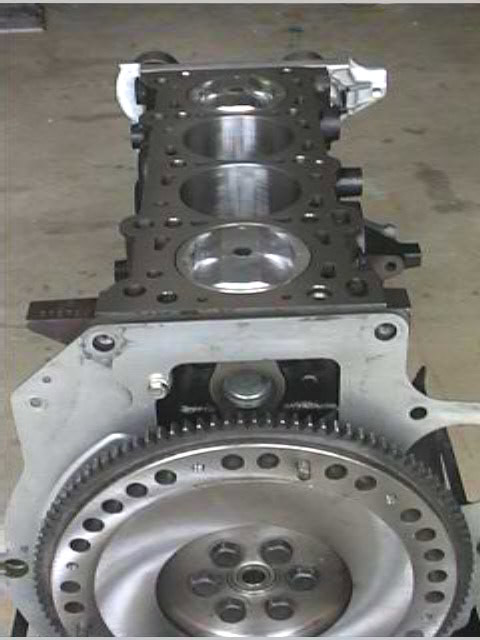
Update 5/21/01 Stan Whitney recently posted his dyno chart (12:1 CR, 99 head, Boig cams, Boig header, TEC-II) and that has become my new bogie. This will be tough to get as he has great peak hp and great torque too.
UPDATE 10/23/00 .I decided I needed more cam on the intake side so I replaced stock 99 Jap spec intake cam with the Webcam 515 model. The '99 J-spec intake cam (part number BP5A12420) has the same lift and basecircle as the USA 99-00 cam but offers 2 degrees more advance. Also replaced stock 1.8l 230cc injectors with RC 370cc units. and replaced the Racing Beat 4-2-1 header with a BSP 4-1 supercharger header. I am now at 142.8 rwhp and still using a bone stock 1994 short block. 160 rwhp is next target by replacing the shortblock with new one that has higher compression pistons.

UPDATE 6/27/99 I have tuned the cam sprockets and fuel injection system for weeks now and have done over 40 dyno runs with the new motor. I seem to be stuck at 155 rear wheel HP (about 181 crank). That number is not particularly truthful either and is just a dyno only setting because the cam timing settings that produced it have huge overlap and consequently the motor doesn't idle worth beans and also has very poor torque below 4250rpm. My everyday cam setting that produces good idle vacuum and low rpm torque dyno's at 138 rear wheel (about 164 crank). I feel the stock spec intake cam is the bottleneck and will look for a stronger one. I will also concider dropping the '99 pistons I have into the block to raise the compression a little more. Still want to get to that exclusive NA 200 crank HP club.
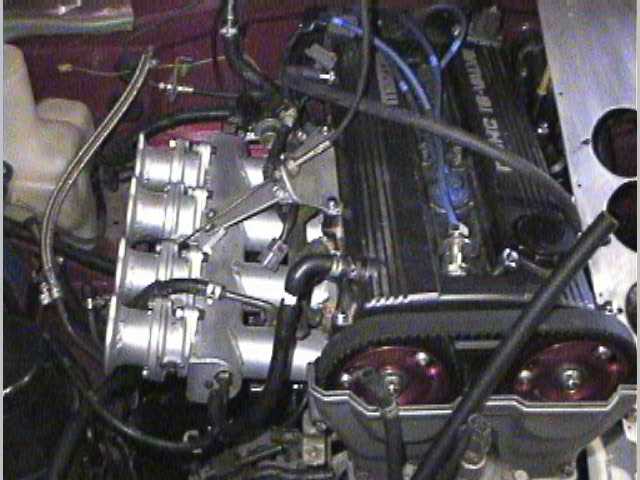
Oversize Throttlebody:
Compare to factory
2.5mm overbore TB (57.5mm vs 55mm). Also had throttle shaft diameter made smaller for even better CFM flow. +2.5mm is about as large as the 1.6 TB can be enlarged because of clearance with the throttle shaft bearings and the IAC chambers. I understand the 1.8 TB has more 'meat' to work with so it can probably be enlarged slightly more. Mine was done by Kinsler Fuel Injection in Michigan.

Injectors:
The standard 230cc 1.8 injectors support only about 160 crank HP at the normal line pressure of 43.5 psi at 85% duty. Since my target was only about 25% over that I opted for increasing the fuel pressure to the injectors vs larger injectors as the means to get more fuel. I raised the WOT fuel pressure to 55psi with a linear adjustable fuel pressure regulator. That pressure increases the injectors relative flow to about 275cc and will support about 200 hp. That pressure is also within the safety margin for injector hydrallic lock and fuel line pressure. Since I have a programable fuel injection computer I could use the less expensive linear unit since I can change the idle and midrange pulse widths to match the needs of the motor. I used a standard Mallory unit originally intended for a Mustang. This pressure is about the max I'm willing to go with the stock injectors, if in the future I want any more HP then I'll install larger injectors. UPDATE 10/23/2000Replaced stock injectors and aftermarket fuel pressure regulator with RC 370cc units.

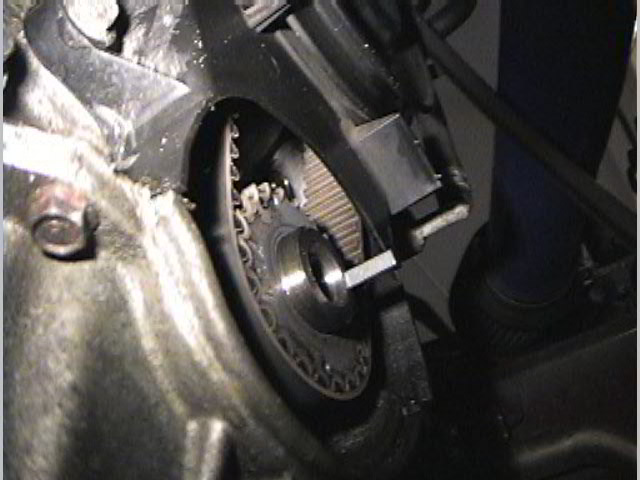
Underdrive accessory pulley:
Unorthodox Racing brand underdrive pulley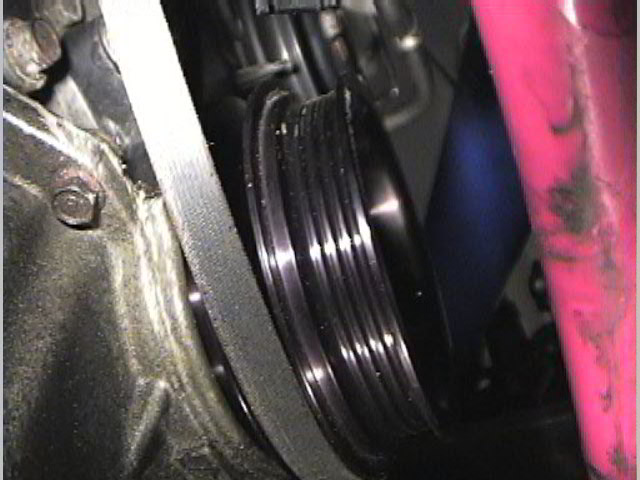
Pulley size compare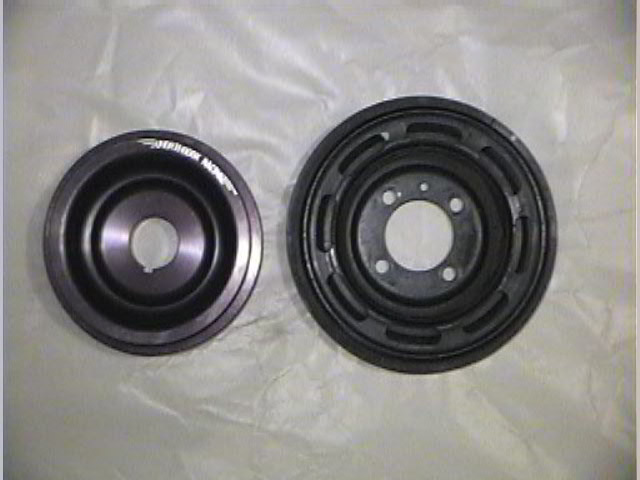
My car is a base model so I don't have PS or AC, so the underdrive pulley was only slowing the alt and waterpump and that probably minimized its benefits. I did notice improvement though in how quick the rpm's rose. I feel in my case, the lighter weight of the unit, just like a lightweight flywheel, provided the gains.
Pulley install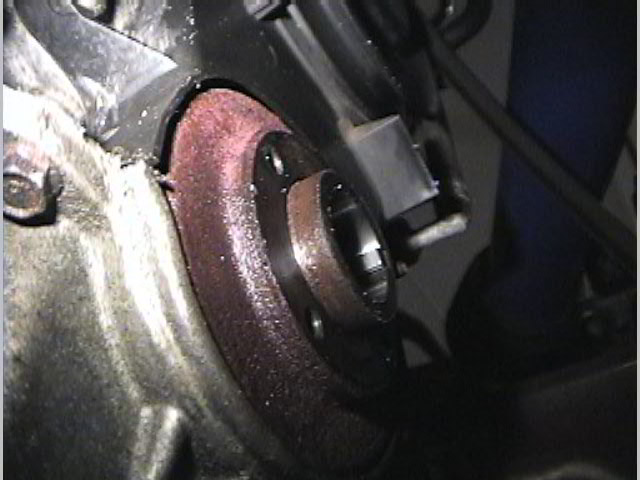
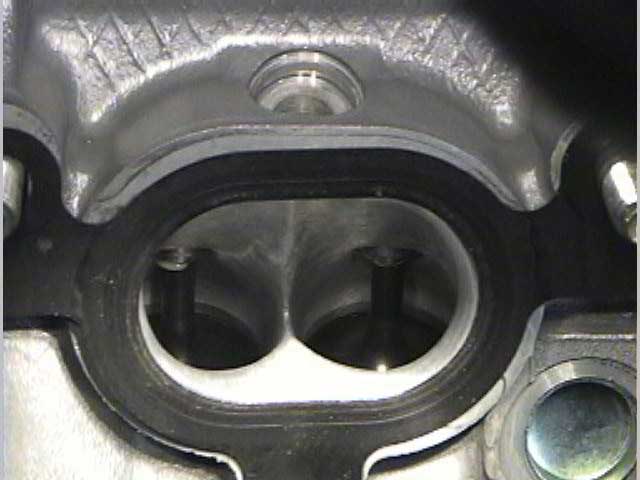
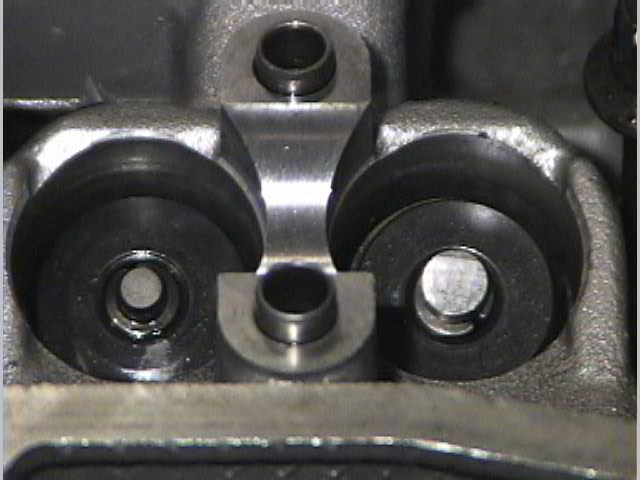
Head:
The head is the real secret to power. But too much porting will cause velocity to drop and can hurt the 'streetability' characteristics. The Miata head is actually a good piece right from the factory so I only choose a cleanup port job and shaving .018". Additionally I had the chambers welded with 7cc of metal to raise the compression ratio further and add more turbulence. The 99+ head flows better on the intake side so if you have access to one of those start with it. (Note that the combustion chamber welding cannot be done exacly like I had done for 99+ pistons since it will interfere with the piston dome)
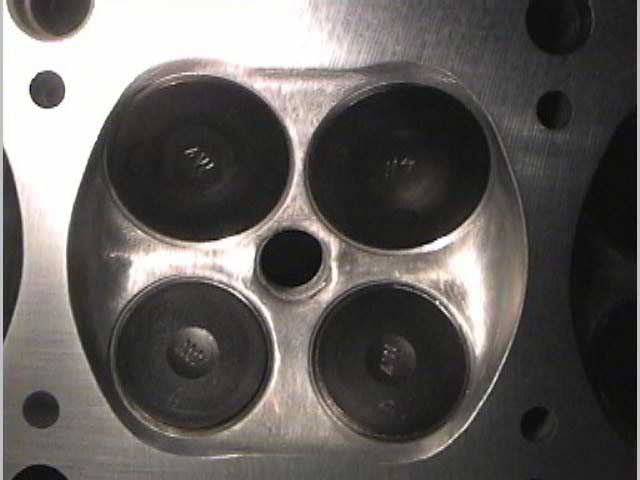
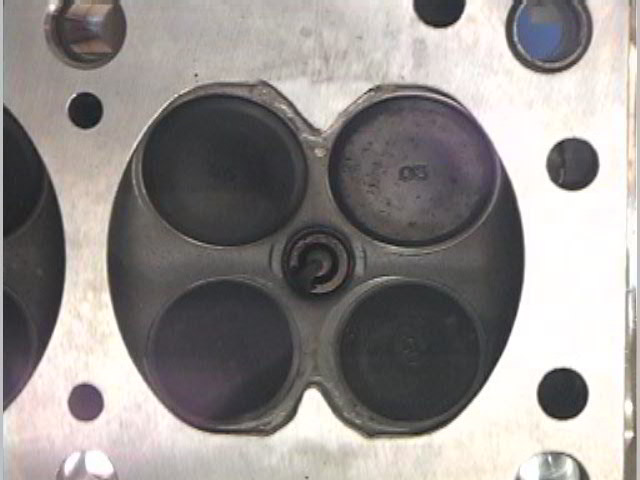 New combustion chamber
 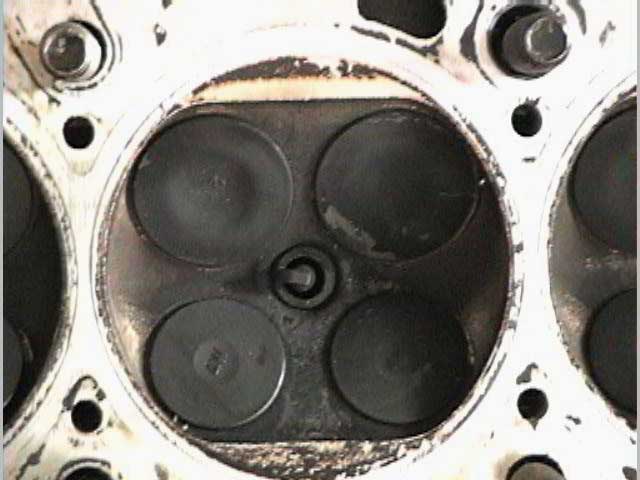 OEM combustion chamber.
Valve Springs:
The factory valve springs are quite good but will bind at lifts over 9mm and it is my experience they will float the valves over 7800 rpm. While there are lots of aftermarket valve springs for the Miata all that I found all required custom retainers and some even require enlarging the seat. I found an over-the-counter Crane item that fits the stock retainers and seat perfectly. It was part number 902-0004 and it's original application is a Volvo 18B/20B (The Crane spring is currently out of production as of 11/99). A second alternative with nearly the same rate specs is the Sealed Power VS-855. I have these in my current race motor. Crane Specs here
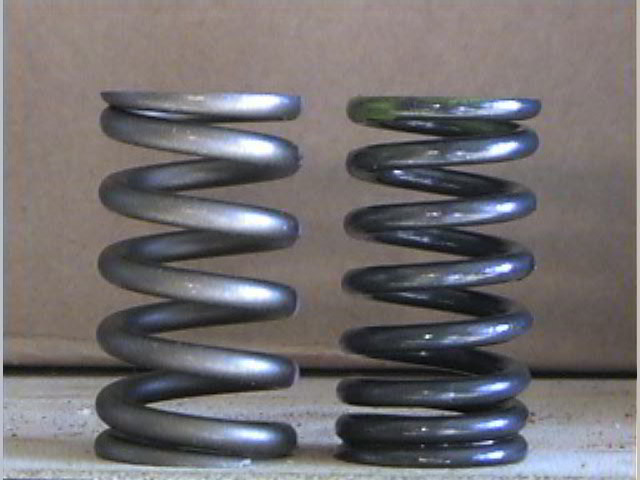 The aftermarket Crane springs (left) vs OEM.
Lifters:
I wanted to use solid lifters because they more readily accept high rpm usage and offer greater performance. I decided to use the solid lifters that came as original equipment on the 99+ Miata (because I already had them. Thanks Russ!) vs the HLA lifters that came on all earlier 1.6 and 1.8 USA engines. The 99+ solid lifters use the standard Mazda 31mm bucket and fit right into the earlier 1.6 and 1.8 heads. (FYI, the retainer and keeper locks are different size so be sure not to mix them - i.e. use 99+ retainers with 99+ keeper locks and 94-97 retainers with 94-97 keeper locks).
Mazda offers shims for adjustment, the stock 99 solid lifter spacers are usually around 3.2 - 3.3mm thick and you can get them from 2.75mm up to 3.75mm height in roughly .05mm increments (smaller than 3.050mm come from the Z5 engine and larger than 3.46mm come from a Millenia Miller cycle engine). Since 3.75mm is the max factory height spacer this means don't want to grind your basecircle more than about .020" unless you want to have custom spacers made or use alternative spacers.
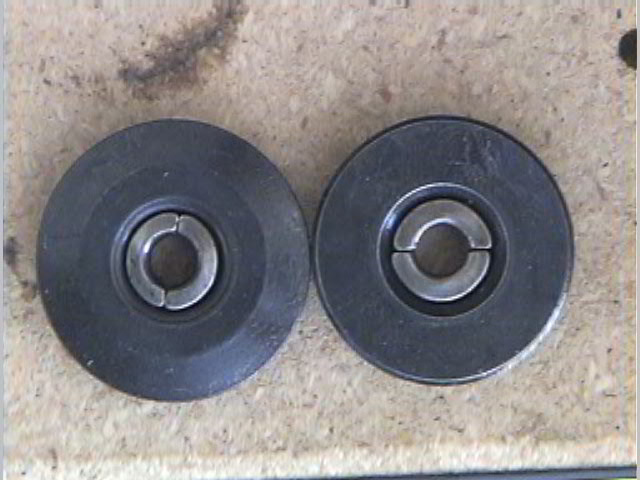 Spring retainer compare solid left, HLA right.
The problem with using thick spacers is that the lifter assembly becomes very heavy and can hurt high rpm performance and long term valvetrain reliability. Also, if cold lash is greater than .010" or so the shim may even pop out of the lifter at high rpm and and demolish the head. RD Spring of Hesperia , CA (760-948-4698) offers a solution in cap shims that fits on the valve stem. The 'B' series DOHC Mazda motors use a 6mm valve stem which is the same as the Toyota 4-AGE engines used for Formula Atlantic motors. The cap shims were originally developed for the FA motors but work just the same in the Miata motor. They come in .035" and .055" thicknesses and are fully hardended so they can be ground down to your exact height requirements.
The use of 99+ solid lifters in earlier heads I have found that the shim needs to be around 3.3 - 3.4mm thick since the 94-97 valve stems are slightly shorter. I try to stay with the smallest sizes (2.75-2.80) to keep the lifter light and then I use a valve stem cap shim to raise the lifter to where the small shim fits.
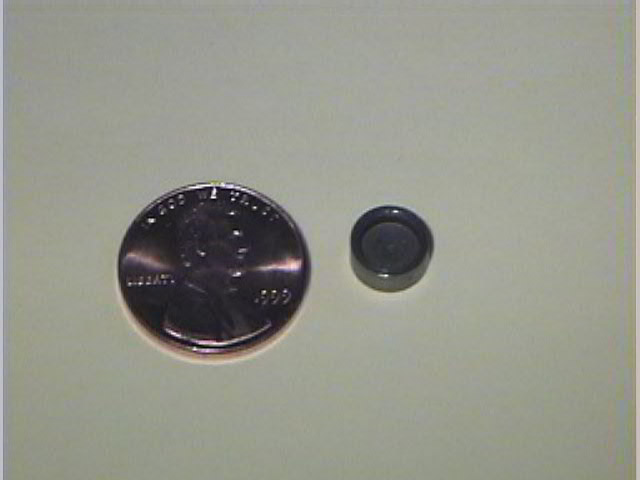
 RD Spring spacer cap. Fits on top of valve stem.
FYI, MazdaSpeed and Mazda Competition also make race quality solid lifters that mate with the HLA retainers and have a greater range of adjustment shims, they are much lighter than the factory stuff too.
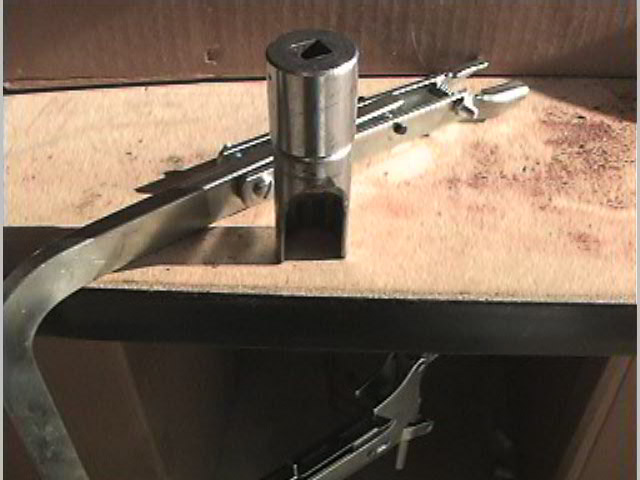
TIP: A normal C-clamp type spring compressor is not designed for a recessed spring like the Miata has. I made an adapter out of an old socket by using a Sawsall to cut a slice out of the side and then shaped with a bench grinder. Works like a charm and didn't have to buy the expensive tool.
Cams:
I chose high lift and big duration cams from Web-cam. I went with their .370 lift (9.4mm), 270 degree model 515. Those specs are 1.2mm more lift and 38 degrees more duration than the stock 94-97 cams! For comparison the 99 USA spec intake cam has a .4mm higher lift than the 90-97 HLA cam (to 8.6mm) and has substantially more .040" duration too. My exhaust cam is also the Webcam 515. They were ground on a bare billets from Mazda Comp. These cams are generally too big for street driven cars with an overlap of 48 degrees. I had to narrow the overlap with the adjustable cam gears to get a decent idle quality.
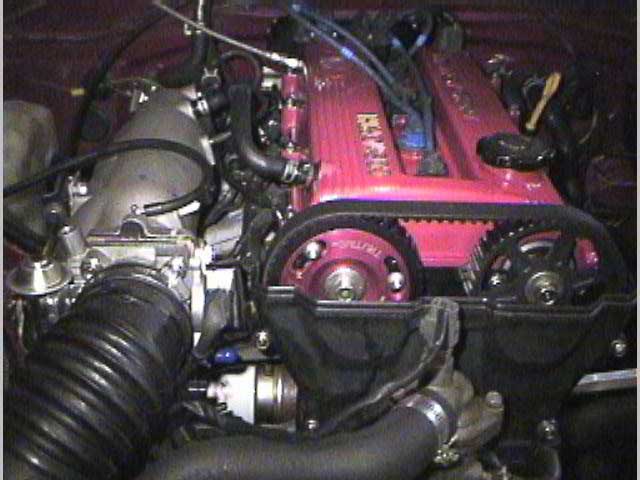
Adjustable cam sprockets:
Because of the custom cams and unusual open/close timing numbers they posted I had to use adjustable cam sprockets to get the overlap numbers were I wanted them. The tuning process takes considerable dyno time to get right. If using the OEM ECU you really cannot go much more than abotu 25 degrees overlap (about 17 inches idle vacuum). I'm running mine at about 30 degrees right now (about 15 inches idle vacuum) since I have a programmable engine management system.
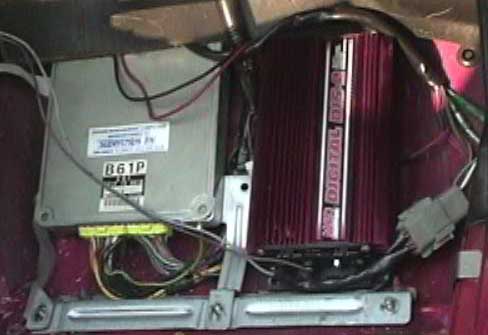
Ignition:
The 1.6 Miata ignition system is margianal for high power use. High rpm (8000+ NA) or high boost (6000+ rpm @ 15 psi +) seem to cause a misfire. The long run from the ignitor to the coils seems to be the culpret. There are 3 choices available. 1) Use a stronger ignitor or reposition it closer. 2) use the '94-95.5 1.8 coils with the built in ignitor 3) use an amplifier/capacitor system such as the MSD DIS (if you have a 1.8 you must backdate to the separate ignitor system of the 1.6 - see instructions on Coollinks page). None of the above is a plug-in options and all require splicing (buy a shop manual!). I choose the MSD DIS. See the coolinks page for write-ups on each.
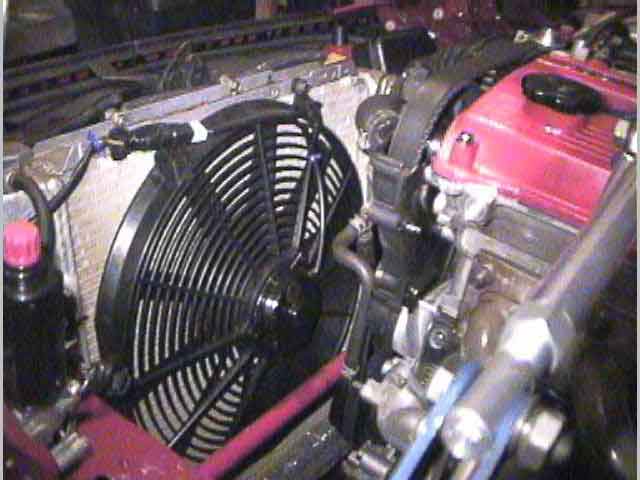
Cooling:
The factory cooling system is poor at best. The 5-speed radiator is a single row unit and it just cannot handle much more heat- just about any performance modification will make the system overheat. The factory temp gauge is also of the "idiot" variety and doesn't move off the 12 o'clock position until the system has almost overheated anyway so you really can't go by the gauge much. The real culpret though is the factory coolant routing. The original cooling path for the 'B' engine as used in FWD cars is front to rear but in the Miata the "engineers" rerouted it to a bottom to top path system. It doesn't really work as designed for two reasons 1) the hot coolant from the back of the head is mixed with the "cool" coolant just coming from the radiator in a manifold (just behind the AC compressor) making the incoming water hot again 2) that hot incoming water then goes to the water pump where most of it circulates right back to the radiator through the front thermostat housing. This makes the water at the back on the engine (#4 cylinder) super hot and doesn't curculate near as fast as it should (also contributing to the lean #4 cylinder lean condition). The real fix is to reroute the water from the back of the head to the radiator input and eliminate that "mixing" manifold. Since that is a lot of work that requires some fabrication, as an interim fix I first added a 3 row aluminum radiator (19" wide - from a Ranger V8 kit) with and a 16" 1949cfm fan. The fan seems to have cured most of my stop and go traffic overheating issues for now.

16" fan from JCWhitney solved all of my stop and go traffic overheating problems. A private label Revcore Item #: 38ZX2528U for $79.95. Rated at 1949 CFM it only uses 10.7 amps!
Final Product:
 19" HOWE 3 core aluminum circle track racing radiator allows room for intake to go strait into nose of car.